Ollama - Building a Custom Model
Table of Contents
Introduction
In the previous post of this series, I introduced Ollama, a powerful tool that simplifies the process of creating, running, and managing large language models (LLMs). It is particularly advantageous for those who want to benefit from the power of LLMs without having to deal with the complexities associated with model management. Aside from managing and running models locally, Ollama can also generate custom models using a Modelfile configuration file that defines the model’s behavior. This post explores how to create a custom model using Ollama and build a ChatGPT like interface for users to interact with the model.
The Modelfile
The Ollama Modelfile is a configuration file essential for creating custom models within the Ollama framework. It facilitates the specification of a base model and the setting of various parameters, such as temperature and num_ctx, which alter the model’s behavior. Additionally, through the SYSTEM instruction within the Modelfile, you can set context or roles for the model, aiding in more contextually aware interactions. This structured approach offered by the Modelfile allows for a clear delineation of model configurations, helping in the reproducible creation and management of custom models. By leveraging the Modelfile, you can tailor models to meet specific project needs within the Ollama environment.
You can compare the Modelfile to Dockerfile, a text document containing a series of instructions used by Docker to automate the creation and configuration of a containerized application environment. In Ollama, Modelfile automates the model creation.
Building A Custom Model - API Security Assistant
Creating a custom model in Ollama follows a structured yet flexible process that allows you to customize models according to your requirements. The process involves a series of sequential and iterative steps that build upon each other, ensuring a coherent and manageable pathway toward the creation of a custom model that adheres to the specified parameters and instructions. The below visualization encapsulates the essence of this process, showcasing the steps involved in creating, deploying, and refining a custom model in Ollama:
-
Base Model Selection - A base model is initially chosen, which acts as a starting point for building our custom model.
-
Parameter Setting - Here, certain rules are set to guide how the model should behave and respond.
-
System Instruction - A basic role or context is provided to the model, helping it understand how it should interact during conversations.
-
Model Creation - With the groundwork laid, the model is crafted using a simple command, bringing our custom model into existence.
-
Model Deployment - Once created, the model is made ready and accessible for interaction with a simple command.
-
User Interaction - Once deployed, users can interact with the model, asking questions or giving tasks based on their needs.
-
Feedback and Iteration - A continuous improvement cycle is established where feedback on the model’s responses can be used to make necessary tweaks, ensuring the model gets better over time.
We will create a custom model based on CodeLlama to assist developers in implementing secure APIs. This is a simple modelfile that takes and responds to any questions related to API security:
# Modelfile for creating an API security assistant
# Run `ollama create api-secexpert -f ./Modelfile` and then `ollama run api-secexpert` and enter a topic

FROM codellama
PARAMETER temperature 1

SYSTEM """
You are a senior API developer expert, acting as an assistant.
You offer help with API security topics such as: Secure Coding practices,
API security, API endpoint security, OWASP API Top 10.
You answer with code examples when possible.
"""
A typical Modelfile consists of instructions and parameters delineating the model’s behavior. Here are the primary components of a Modelfile:
- FROM Instruction - The FROM instruction is essential as it defines the base model that your custom model will build upon. For instance,
FROM codellamain the example modelfile indicates that the custom model will be based on thecodellamamodel.
CodeLlama CodeLlama is a code-specialized version of Llama 2 built by the Meta Engineering team. It is tailored to generate code and natural language descriptions about code from both code and natural language prompts. By leveraging text prompts, it assists developers in creating code and understanding code snippets, making the coding process more efficient and accessible to both seasoned developers and newcomers. CodeLlama’s enhanced coding capabilities stem from additional training on code-specific datasets, part of an endeavor to create a family of large language models for code based on Llama 2. You can find more about CodeLlama here
-
SYSTEM Instruction - The SYSTEM instruction is utilized to set a system prompt that guides the model’s behavior during interactions. For example, setting a system prompt like
SYSTEM You are a senior API developer expert, acting as an assistantcan steer the model towards a particular context or role. -
PARAMETER Instruction - The PARAMETER instruction allows you to set various parameters that influence the model’s behavior, such as
temperatureandnum_ctx. Temperature controls the randomness of the model’s outputs, whilenum_ctxadjusts the context size. -
Additional Instructions - Besides the primary instructions, you may encounter other instructions like TEMPLATE or custom instructions that further tailor the model’s behavior
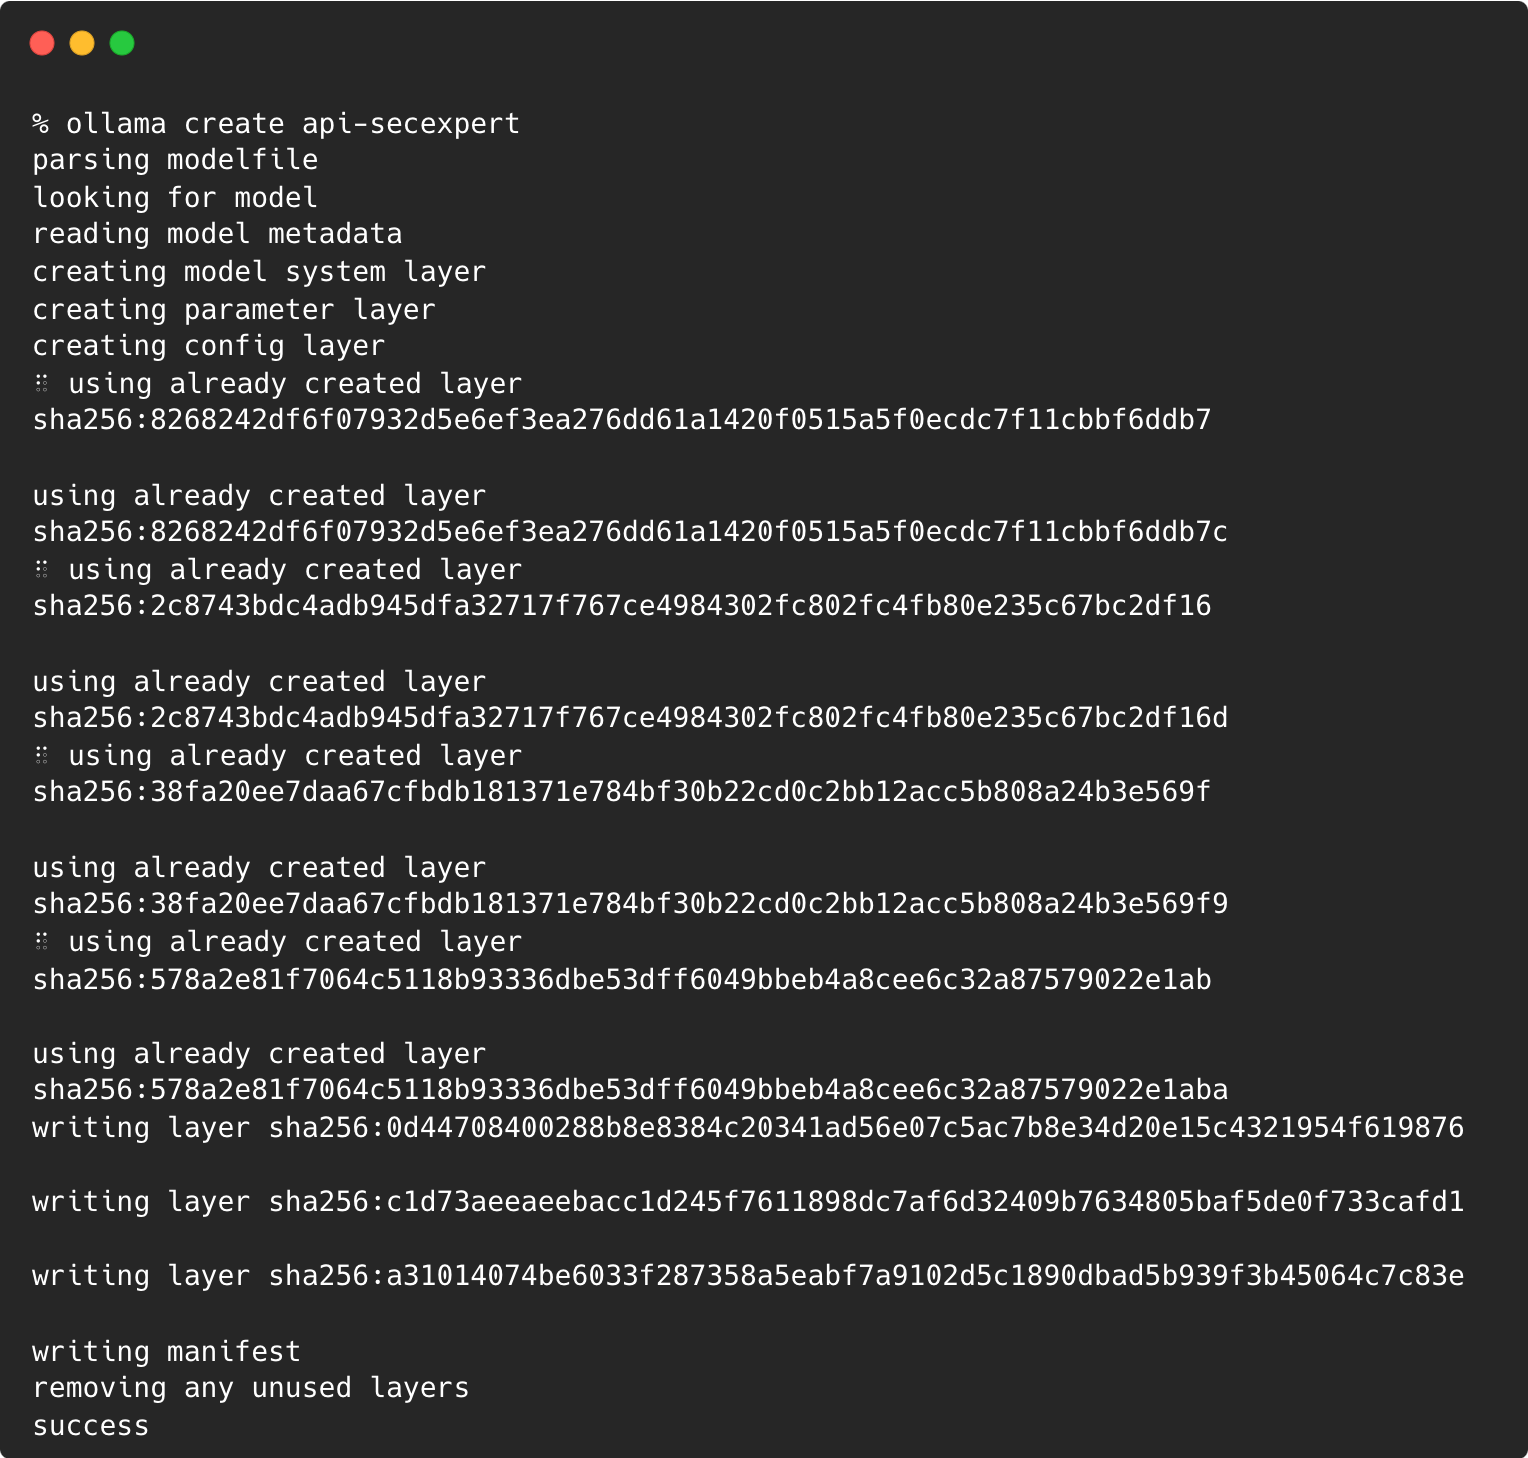
To create the custom model defined in the Modelfile, execute following command:
ollama create api-secexpert
The Ollama create option will build the custom model based on instructions in the supplied Modelfile:
You can use the Ollama list option to get the list of models downloaded or created locally:

Running The Model
To run the model in the command line, use the run option followed by the model name:
ollama run api-secexpert
You can ask any questions on API security, and the model will give you an expert answer. Further models can be finetuned and trained.
Building An Interface Like ChatGPT For Custom Model
In this section, we will explore how to create a ChatGPT-like chatbot interface for our custom model utilizing two powerful tools: LangChain and Streamlit. LangChain, a library designed to interact with various Language Models and Language Model Management Systems, will serve as the conduit to our custom model, facilitating seamless interaction. On the other hand, Streamlit, an open-source app framework, will provide a user-friendly interface through which users can interact with our chatbot. The amalgamation of LangChain’s robust language model interaction capabilities and Streamlit’s intuitive, real-time app development features will enable us to create an engaging and responsive chatbot interface. Through this endeavor, we aim to demonstrate how effortlessly one can bridge the gap between sophisticated language models and user-friendly applications, thereby enhancing user engagement and experience.
What Is LangChain?
LangChain is a Python library designed to provide a streamlined interface to interact with various Language Models (LMs) and Language Model Management Systems (LLMS). It acts as an abstraction layer, allowing access and utilization of powerful language models such as OpenAI’s GPT-3 or Llama2 with a unified API, regardless of the underlying implementations or providers. LangChain aims to simplify the integration of language models into applications, reducing the learning curve and development time required to leverage the capabilities of these models.
Additionally, LangChain provides tools for managing and interacting with LLMS, facilitating language model deployment, scaling, and management. This is particularly useful for working on complex or large-scale applications where efficient language model management is crucial. By offering a user-friendly and consistent interface across different language models and management systems, LangChain helps to democratize access to advanced natural language processing capabilities, making it easier to incorporate cutting-edge language technologies into their projects. Find more about LangChain here.
What Is Streamlit?
Streamlit is an open-source app framework for Machine Learning and Data Science teams. It simplifies the process of turning data scripts into shareable web apps. With just a few lines of Python, you can create interactive reports and dashboards, real-time stream processing apps, or even complex interactive applications. Streamlit’s intuitive and straightforward API requires no front-end experience, making it a convenient choice for data scientists and engineers looking to visualize data, build interactive tools, or showcase machine learning models in a web interface. Find more about Streamlit here.
Before we build the Chatbot, we need to ensure all the necessary prerequisites are met. Ensure you have the latest version of Python installed. Install the streamlit & langchain packages.
pip install streamlit langchain
Now, let’s create a Python file chatbot.py and copy the following contents:
import streamlit as st
from langchain.llms import Ollama
import time
# App title
st.set_page_config(page_title="👨🏻💻 API Security Chatbot")
with st.sidebar:
st.title("👨🏻💻 API Security Chatbot")
# Initialize Ollama
ollama = Ollama(model="api-secexpert")
# Store LLM-generated responses
if "messages" not in st.session_state.keys():
st.session_state.messages = [{"role": "assistant", "content": "How may I assist you today?"}]
# Display or clear chat messages
for message in st.session_state.messages:
with st.chat_message(message["role"]):
st.write(message["content"])
def clear_chat_history():
st.session_state.messages = [{"role": "assistant", "content": "How may I assist you today?"}]
st.sidebar.button('Clear Chat History', on_click=clear_chat_history)
# Function for generating Ollama response
def generate_ollama_response(prompt_input):
string_dialogue = "You are a helpful assistant. You do not respond as 'User' or pretend to be 'User'. You only respond once as 'Assistant'."
for dict_message in st.session_state.messages:
if dict_message["role"] == "user":
string_dialogue += "User: " + dict_message["content"] + "\n\n"
else:
string_dialogue += "Assistant: " + dict_message["content"] + "\n\n"
response = ollama.__call__(prompt=f"{string_dialogue} {prompt_input} Assistant: ")
return response
# User-provided prompt
if prompt := st.chat_input():
st.session_state.messages.append({"role": "user", "content": prompt})
with st.chat_message("user"):
st.write(prompt)
# Generate a new response if the last message is not from the assistant
if st.session_state.messages[-1]["role"] != "assistant":
with st.chat_message("assistant"):
response = generate_ollama_response(prompt)
placeholder = st.empty()
full_response = ''
for char in response: # Assume response is a string
full_response += char
placeholder.markdown(full_response)
time.sleep(0.05) # Adjust the delay as needed
message = {"role": "assistant", "content": full_response}
st.session_state.messages.append(message)
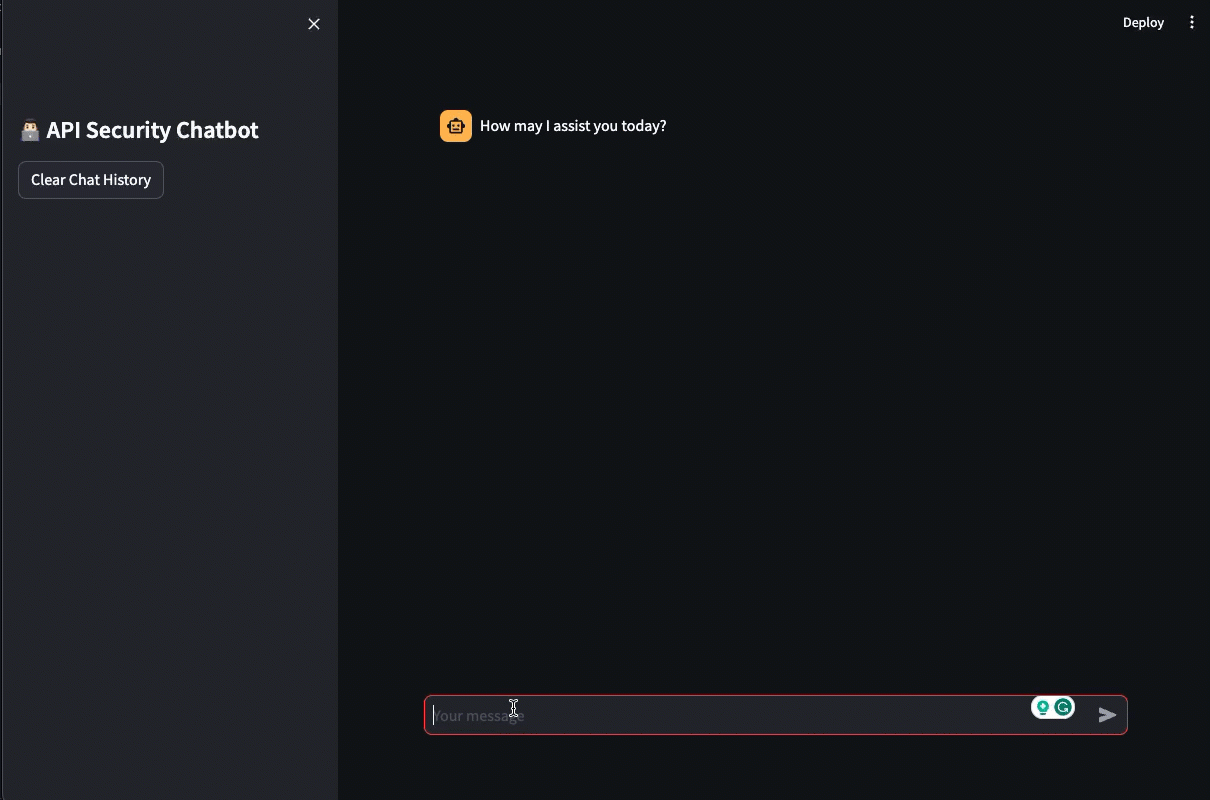
The program creates an interactive chat interface similar to ChatGPT. Users can ask questions and receive responses from the chatbot, which is powered by the custom Ollama model. The chat history can be cleared at any time, and Ollama’s responses are displayed dynamically and engagingly, resembling a typewriter. The visualization below shows the sequence of steps that occur during the interaction:
The program elegantly combines Streamlit’s interactive features with LangChain’s Ollama to create a user-friendly chatbot interface, demonstrating a practical application of integrating a custom model into a web-based chat interface.
Running the Chatbot
Ensure the model is running with Ollama. Run the following command to launch the Chatbot UI:
streamlit run chatbot.py
This command launches the Chatbot UI in the browser. You can ask questions, and Chatbot will display responses from the model running in Ollama:
Ending
Ollama offers a robust and user-friendly approach to building custom models using the Modelfile. You can quickly develop and deploy AI-powered applications using custom models and build user-friendly interfaces for these models.
In the next post, we will build more advanced apps using LLM’s and Ollama.
/bye